Setup Single Sign-On with Workspace ONE & ServiceNow (Mobile Flows Series - Part 1)
Weeks like this remind us that time is a valuable commodity, where seconds count, and getting more done with less is the expectation. Typically interacting with enterprise services requires logging on, remembering passwords, and in a mobile context; opening up a separate application or website to complete the task. In bandwidth constrained scenarios; this alone can make completing any task more time consuming than anyone wants.
Mobile Flows in Workspace ONE is a framework that allows enterprises to present notifications with contextual information and actions to users. This provides users the ability to perform actions on various backend products and services (Concur, ServiceNow, Jira, Salesforce, and any service with custom mobile flows connectors,) without having to leave their email client. Mobile Flows are also available in Intelligent Hub. Intelligent Hub, being cross-platform, extends the capabilities of Mobile Flows to any modern workspace your users or devices might be on (Android, iOS, macOS, Windows 10).
Mobile Flows in Workspace ONE is a framework that allows enterprises to present notifications with contextual information and actions to users. This provides users the ability to perform actions on various backend products and services (Concur, ServiceNow, Jira, Salesforce, and any service with custom mobile flows connectors,) without having to leave their email client. Mobile Flows are also available in Intelligent Hub. Intelligent Hub, being cross-platform, extends the capabilities of Mobile Flows to any modern workspace your users or devices might be on (Android, iOS, macOS, Windows 10).
Mobile Flows leverages Workspace ONE Access to broker communication with any number of identity providers or user stores, Workspace ONE UEM to communicate with Intelligent Hub, and finally Mobile Flows Connectors to communicate with backend systems. To make all this happen, think; JSON, API calls and your imagination. Your users, in their mobile flow, can interact with any service with an API endpoint.
 | |
|

The mobile flow could be approving a notification when they open an email for a ServiceNow request; allowing you the ability to approve a request for a Tesla Model Y (by default, there is no ability to deny a request for a Model Y in Mobile Flows, jk). The mobile flow could be more interesting. There could be an approval necessary for a purchase order in Salesforce. Really anything else with an API accessible can be presented in the notification card, and the user can approve perform an action. An action like allowing a discount, with the flow allowing the user to specify a discount up to a configurable value (e.g. 15% max discount). With a custom connector, the mobile flows capability is limited by the capability of the service you interact with, as the framework can be customized to interact with any backend system.
Before we start building custom connectors with Spring or NodeJS; we will cover the basics like acquiring and integrating a ServiceNow tenant with our environment. ServiceNow developer tenants are free and easily integrated with out of box connectors in mobile flows. In blog posts to follow, we will cover Mobile Flows setup, working with out-of-box connectors, and approving that Model Y for an office worker in Maui. Initially we will just get single sign-on with ServiceNow setup with Access. Once we have a few examples in ServiceNow with Mobile Flows; we can look at setting up out of box connectors with other enterprise services like Salesforce. Cue the Hawaiian pictures...
 |
For more information on Mobile Flows, see the PDF at the following URL below;
Workspace ONE Mobile Flows ServiceNow & Workspace ONE Access (Identity Manager) integration overview:
 Sign up for your developer tenant, or login to your existing tenant, and agree to terms of service:

Request an instance of ServiceNow, if you do not already have one:

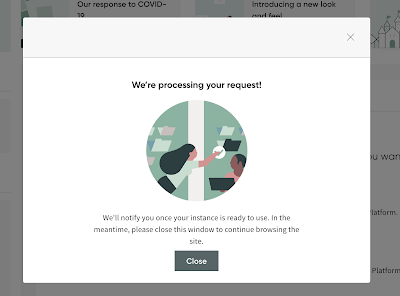
 Wait for your request for a ServiceNow instance to be fulfilled:

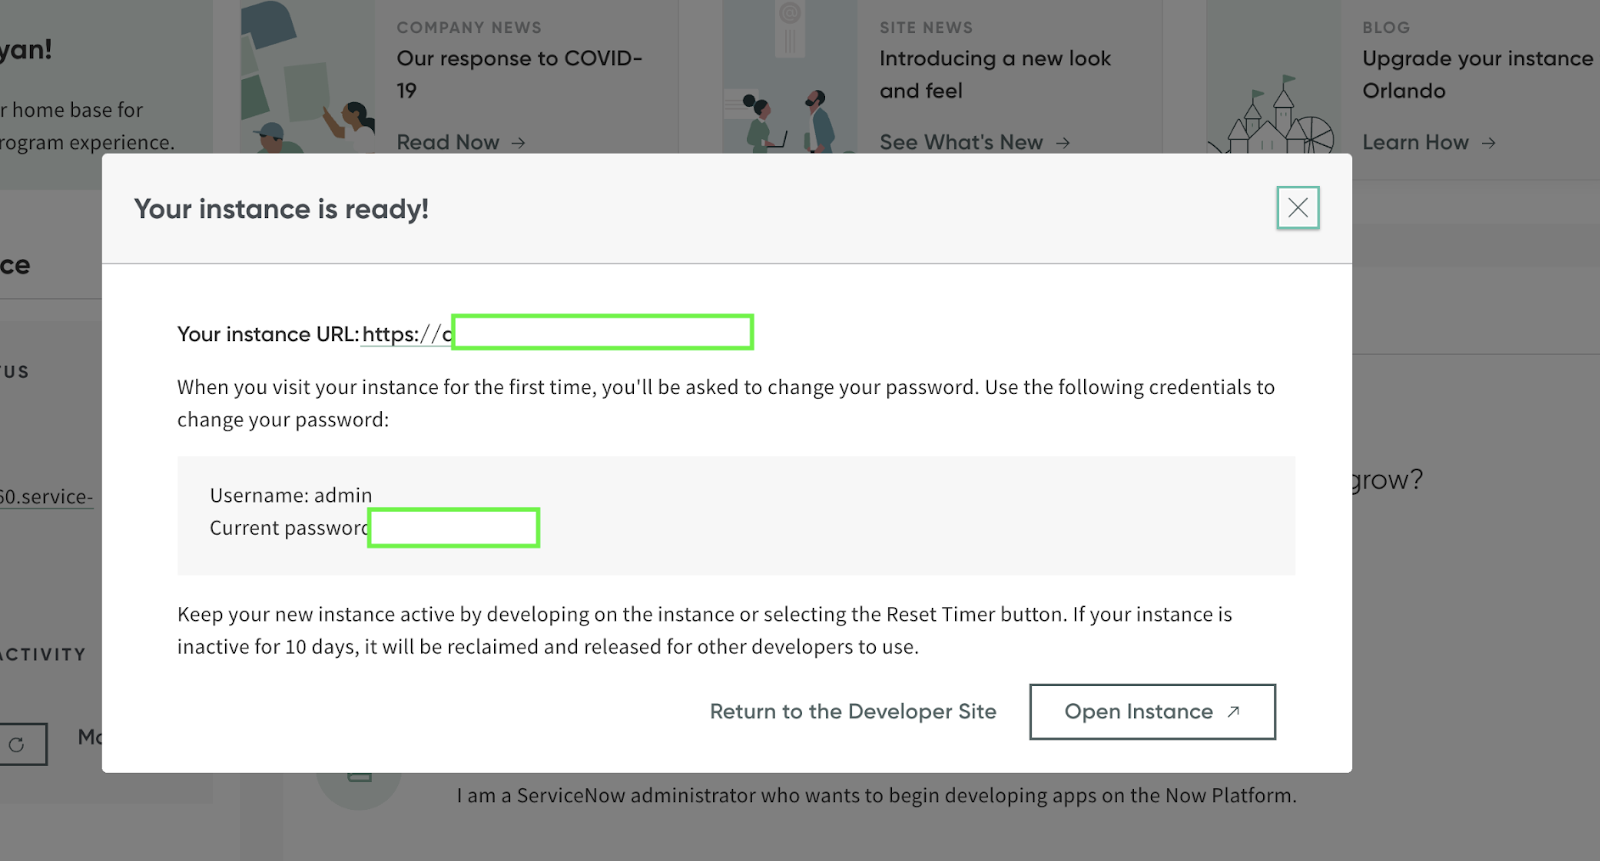
Open instance is provisioned, you will be taken to the following web-page:


 Once the plugin completes activation, click 'Close & Reload Form'


 The short description is unnecessary, but there is no harm in setting it. To complete this page, we need to grab some information from VMware Workspace ONE Access, formerly known as VMware Identity Manager (vIDM). In this example; we see the URL for this service is located at: https://idm.ryanpringnitz.com
 Click on 'Catalog' followed by 'Web Apps'
 Click 'Settings'
 In the new window that appears, click 'SAML Metadata'
 We need to download the 'Identity Provider (iDP) metadata' xml file, named idp.xml
 Then we need to scroll down, and find the 'Signing Certificate', then download the 'Signing Certificate'


 I like to check 'Yes' to turn on debug logging for SAML 2.0 Authentication. This is optional.
 Back to Workspace ONE Access To quick recap what we've done so far:

In the 'Name' form-field, type in ServiceNow. Click 'Next' Optionally, add an icon of something cool, like a picture of a Tesla parked at a beach in Maui. Since the Mobile Flow is not setup yet, the request for the Tesla cannot be approved. Therefore there is no picture of a Tesla parked at a beach in Maui. The icon will therefore be blank in our example, but a ServiceNow logo would also be appropriate.


 For the SaaS application to present itself in the User Portal; 'Show in User Portal' must be set to 'Yes'


 Configure the Policy Rule appropriately. To keep it simple. The policy will be left to values of; If a user's network range is ALL RANGES and a user accessing content from All Device Types and user belongs to (no groups selected) Then perform this action Authenticate using... then the user may authenticate using 'Password (cloud deployment)' *Note - Password (cloud deployment) authentication method will use the built-in identity provider, which will use a Identity Manager Connector to use an auth method of 'PasswordIdpAdapter'. This allows the connector(s) to communicate with Active Directory.


 The 'Edit SaaS Application' window will appear, click 'Next' to proceed to 'Access Policies'. At the 'Access Policies' page, click the drop-down and specify the ServiceNow Access Policy created previously (reminder: the Access Policy was named 'ServiceNow').
 Select the 'ServiceNow' application previously created, and click 'Edit'. In the new window that appears, allowing you to edit the SaaS application, click 'Next', followed by 'Save'. At this time, we have setup;


Reference: VMware Workspace ONE Documentation Home Workspace ONE Mobile Flows VMware Identity Manager Integration with ServiceNow
- Acquire ServiceNow tenant
- Acquire Identity Provider (idP) metadata (idp.xml)
- Acquire Signing Certificate
- Add/activate ServiceNow plugin (Integration - Multiple Provider Single Sign-On)
- Configure SAML Properties & Certificate in ServiceNow
- Create VMware Workspace ONE Access (formerly known as Identity Manager) Policy
- Create SaaS application for ServiceNow in VMware Workspace ONE Access
- Assign ServiceNow to users
- Ensure user exists in ServiceNow before testing single sign-on


Request an instance of ServiceNow, if you do not already have one:

I will be using the 'Orlando' release of ServiceNow. Go ahead and click on the release, and click 'Request':


Search for 'plugin' in the upper-left corner:

Search for 'Integration - multiple provider Single Sign-On Installer'
 |
| Before you type the entire phrase in, results will begin to appear |
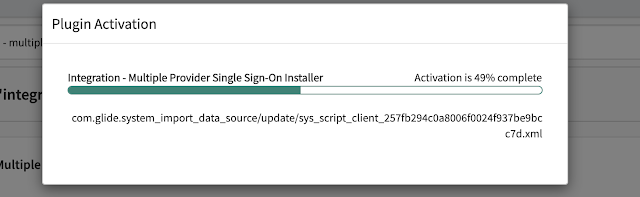
Click 'Install'. This will bring a new window up, prompting you to select 'Activate'

 Once the plugin completes activation, click 'Close & Reload Form'
Now that the plugin is installed and activated; we can proceed to search for 'SAML', and then click 'Certificate'

Click on the original 'SAML 2.0' entry. In the event we need it later, we can keep it by renaming it to 'SAML 2.0 - original' and saving it:
Create a new record. It is important that it be named correctly. The entry must be named: SAML 2.0

Back over in ServiceNow; double check for 'Format' is set to 'PEM'. Then copy the 'Signing Certificate' verbatim, and then paste it in the 'PEM Certificate' form field. Then click 'Save'
Now we can view our newly created X.509 certificate called 'SAML 2.0'
Now that the new SAML 2.0 X.509 Certificate is loaded, we can proceed to configure the Properties.
If you still have the search results for 'SAML' available; click 'Properties'
VMware provides incredible documentation outlining all of the required values. The documentation is available in PDF format at the following link: VMware Identity Manager Integration with ServiceNow I have added my instances details below, and noted the appropriate values to enter. The user will login to their ServiceNow account, in my scenario, with their email address. E.G. maui@ryanpringnitz.com The 'Properties' area of ServiceNow is filled out in the images below: 
- Obtained a ServiceNow tenant, installed a plugin for SSO
- Provided our idp.xml location from Workspace ONE Access (vIDM), which provides the security token (SAML).
To quick recap what we need to do still:
- Setup a Policy in Workspace ONE Access, with the policy specifying the criteria necessary to be satisfied before the user is authorized
- Create a new SaaS application for our particular ServiceNow instance in Workspace ONE Access, and assign the user the resource.
- Create the user (maui@ryanpringnitz.com) in ServiceNow, as the user does not exist in the ServiceNow environment
Note: This environment does not reflect the potential capabilities offered with Workspace ONE Intelligence & Risk Score authentication.
VMware covers authentication methods in much greater detail at the following PDF below for Access 20.01.
Login to your Workspace ONE Access tenant or appliance:
Click on 'Catalog' followed by 'Web Apps', and then 'New'
In the 'Authentication Type' specify 'SAML 2.0', followed by clicking the 'Manual' radiobox.
Fill in the form fields as per your ServiceNow tenant;
Single Sign-on URL: https://dev89492.service-now.com/navpage.do
Single Sign-on URL: https://dev89492.service-now.com/navpage.do
Recipient URL: https://dev89492.service-now.com/navpage.do
Application ID: https://dev89492.service-now.com
Application ID: https://dev89492.service-now.com
Specify the 'Username Format' as:
Email Address
Specify the 'Username Value' as:
${user.email}
Ensure 'Sign Response' is set to 'Yes' Ensure 'Sign Assertion' is set to 'Yes'

If you already have created a Access Policy, select the appropriate policy here. Otherwise select 'default_access_policy_set'. The Access Policy named 'ServiceNow' was created prior to this application. You can modify the Access Policy at another time.
Click 'Save and Assign'. In the new window that appears, select the user and/or user groups. Followed by changing the 'Deployment Type' to Automatic


Optionally, we can create a Access Policy now. If you used an existing Access Policy, or the default_access_policy, you are able to tTo do this;
Click 'Identity & Access Management', followed by clicking 'Add Policy'

Define a Policy Name in the form field. In the 'Applies To' search box, click in the search box for a list of applications to pick from appear. Select 'ServiceNow', and then click 'Next'
Click 'Add Policy Rule' to define the policy rules.
Click 'Save'.
If you need to assign the Access Policy to the previously created SaaS application (ServiceNow); navigate to 'Catalog' in the top of the console. Once the catalog loads, select the 'ServiceNow' application and click 'Edit'.


- Access Policy
- Created, if necessary
- Assigned to Resource (ServiceNow)
- Specified Access Policy rules (Password (cloud deployment))
- Created SaaS application (ServiceNow)
- Assigned to user/user group
- Setup Single Sign-On in ServiceNow
- Activated, installed plugin
- Configured Properties, Certificate
If your ServiceNow tenant is not integrated with LDAP and populating users and user email accounts; you will need to create the user you wish to test with. Since the domain ryanpringnitz.com is not integrated with ServiceNow; we will quickly cover how to create the maui@ryanpringnitz.com user in ServiceNow.
Login to your ServiceNow tenant, if you are being redirected to VMware Workspace ONE Access for Single Sign-On and unable to login; you can access the tenant through the side door. Available at the following address: https://{tenant}.service-now.com/side_door.do

Search for 'Users', followed by clicking 'Users' in the menu

Before adding maui@ryanpringnitz.com, search for the user to verify they do not already exist:
The user does not exist, and we can proceed to click 'New'. Once inside the New Record page, fill out the user details. Recall that the identifier in the Name ID SAML attribute is the email address. It is critical that there are no typos in the email address. Once the user details are filled out, click 'Submit'
Finally, two videos to demonstrate single sign-on configuration, and single-sign on in Safari. At this time, the user is able to perform both iDP initiated or SP initiated SSO flow.
Mahalo,
Ryan Pringnitz


Comments
Post a Comment